Introduction
Use-cases
A. Fin-tech (Transactional) - A user made a payment and you want to send a WhatsApp message to the user about the payment with the following options -
1. View payment status
2. View invoice
3. Make a new payment
B. Media and Entertainment (Retention) - You want to inform user about the new shows/movies that might relevant to the user
1. Play Now
2. Add to Watchlist
3. Show more
4. Open App
C. Ed-Tech (Adoption) - You want to remind the user of his/her upcoming course with the following options -
1. View course details
2. View pre-reads
3. Share course
4. Join class
In each of these use cases, the user can respond to the WhatsApp message and your bot recipe will guide them through their problem or connect them to your team.
MoEngage <> Oriserve
The MoEngage and Oriserve integration allows you to seamlessly orchestrate the end-to-end customer lifecycle from bot builder, routed into a conversational experience via intelligent retargeting.
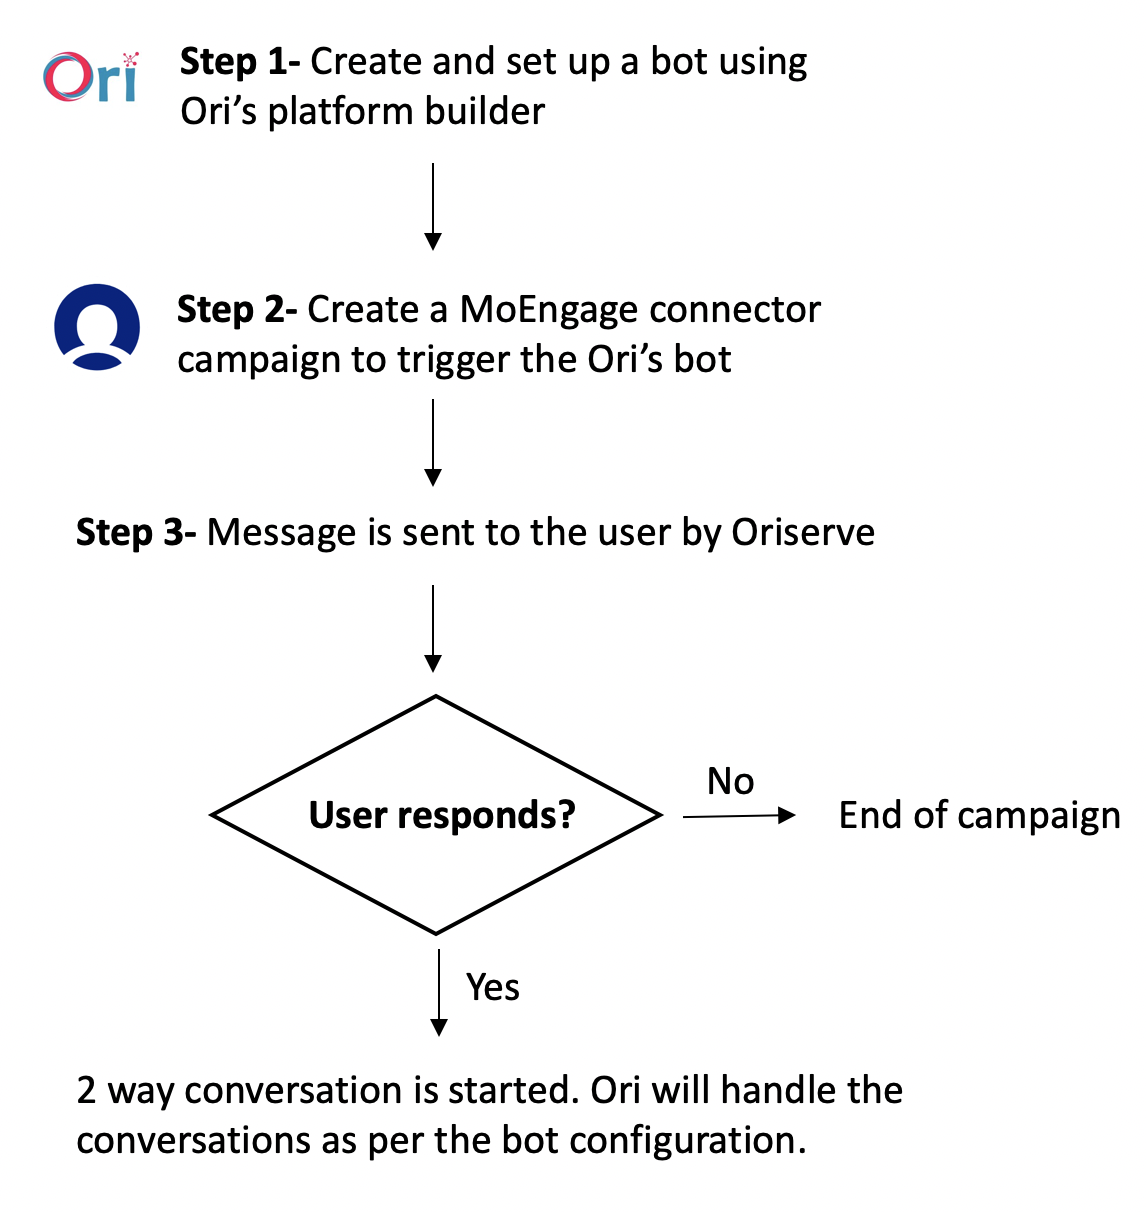
Bot needs to be created and configured on your Oriserve dashboard. The messages are then triggered using MoEngage connector campaigns.
Integration
| library_add_check |
Prerequisites
|
Step 1: Set up a bot experience on Oriserve
1. Navigate to Bot Builder section on your dashboard and create a workflow. 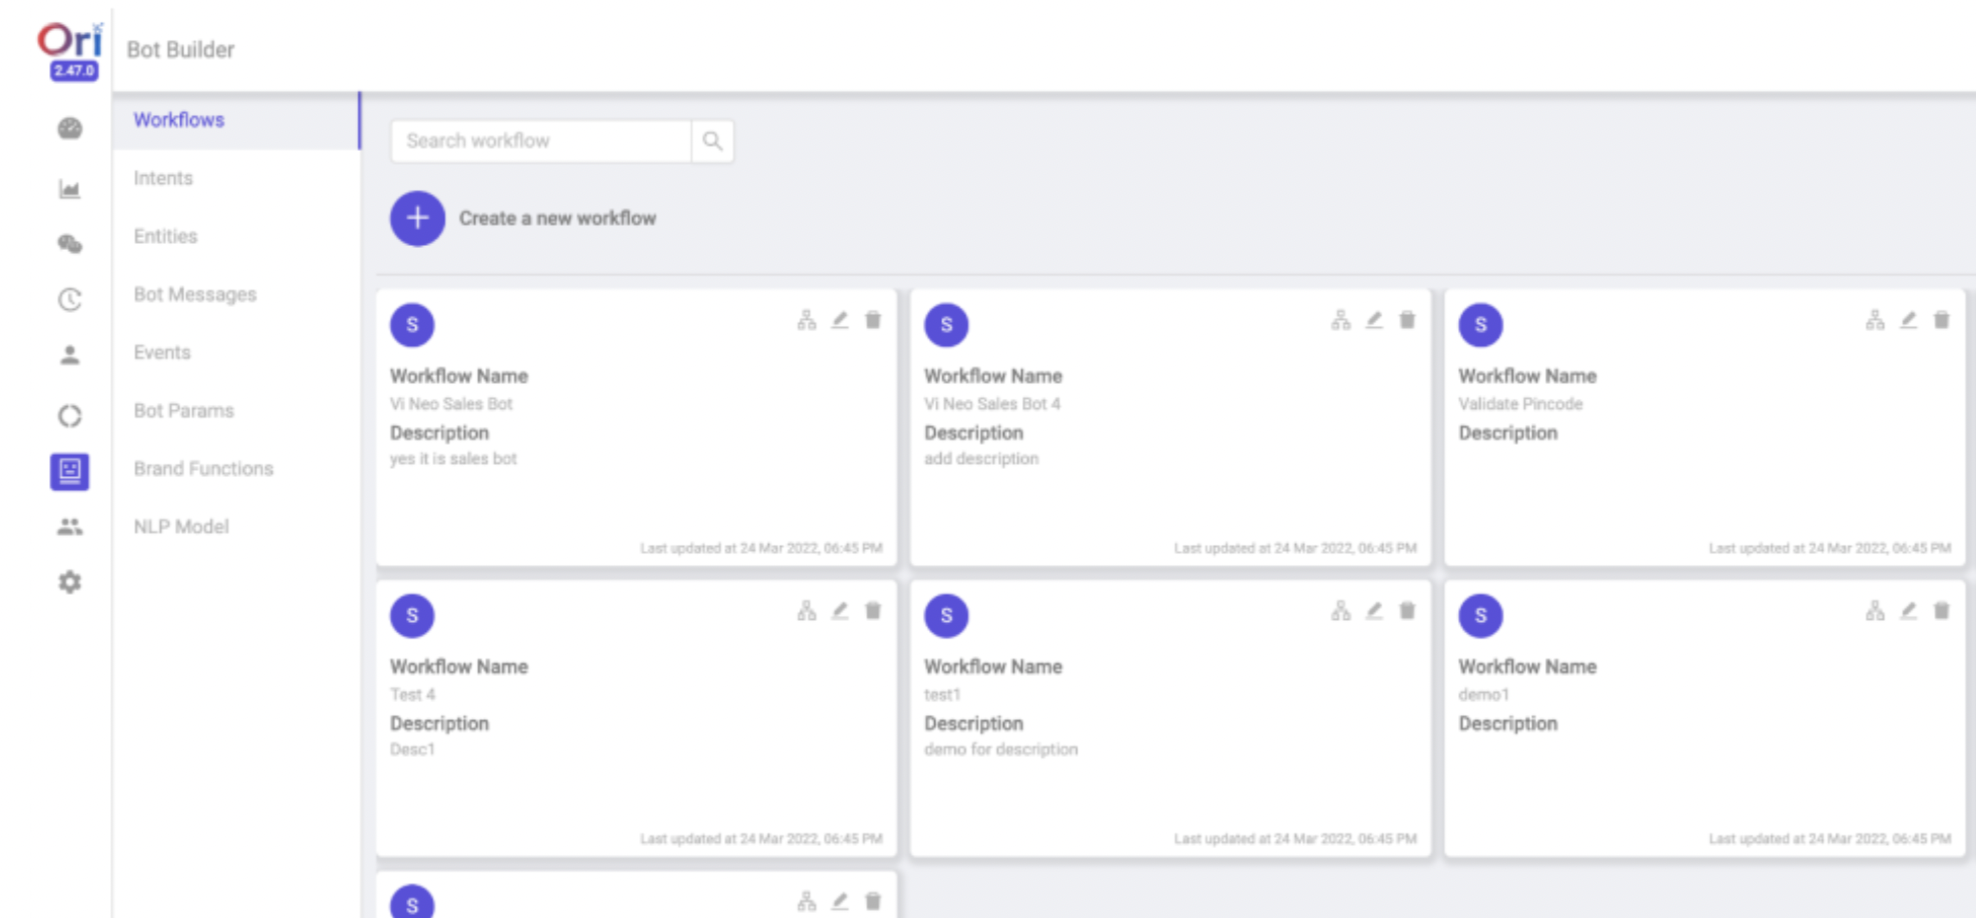
2. Setup Flows as per your business use-cases. Flows are the building blocks to handle user conversations. 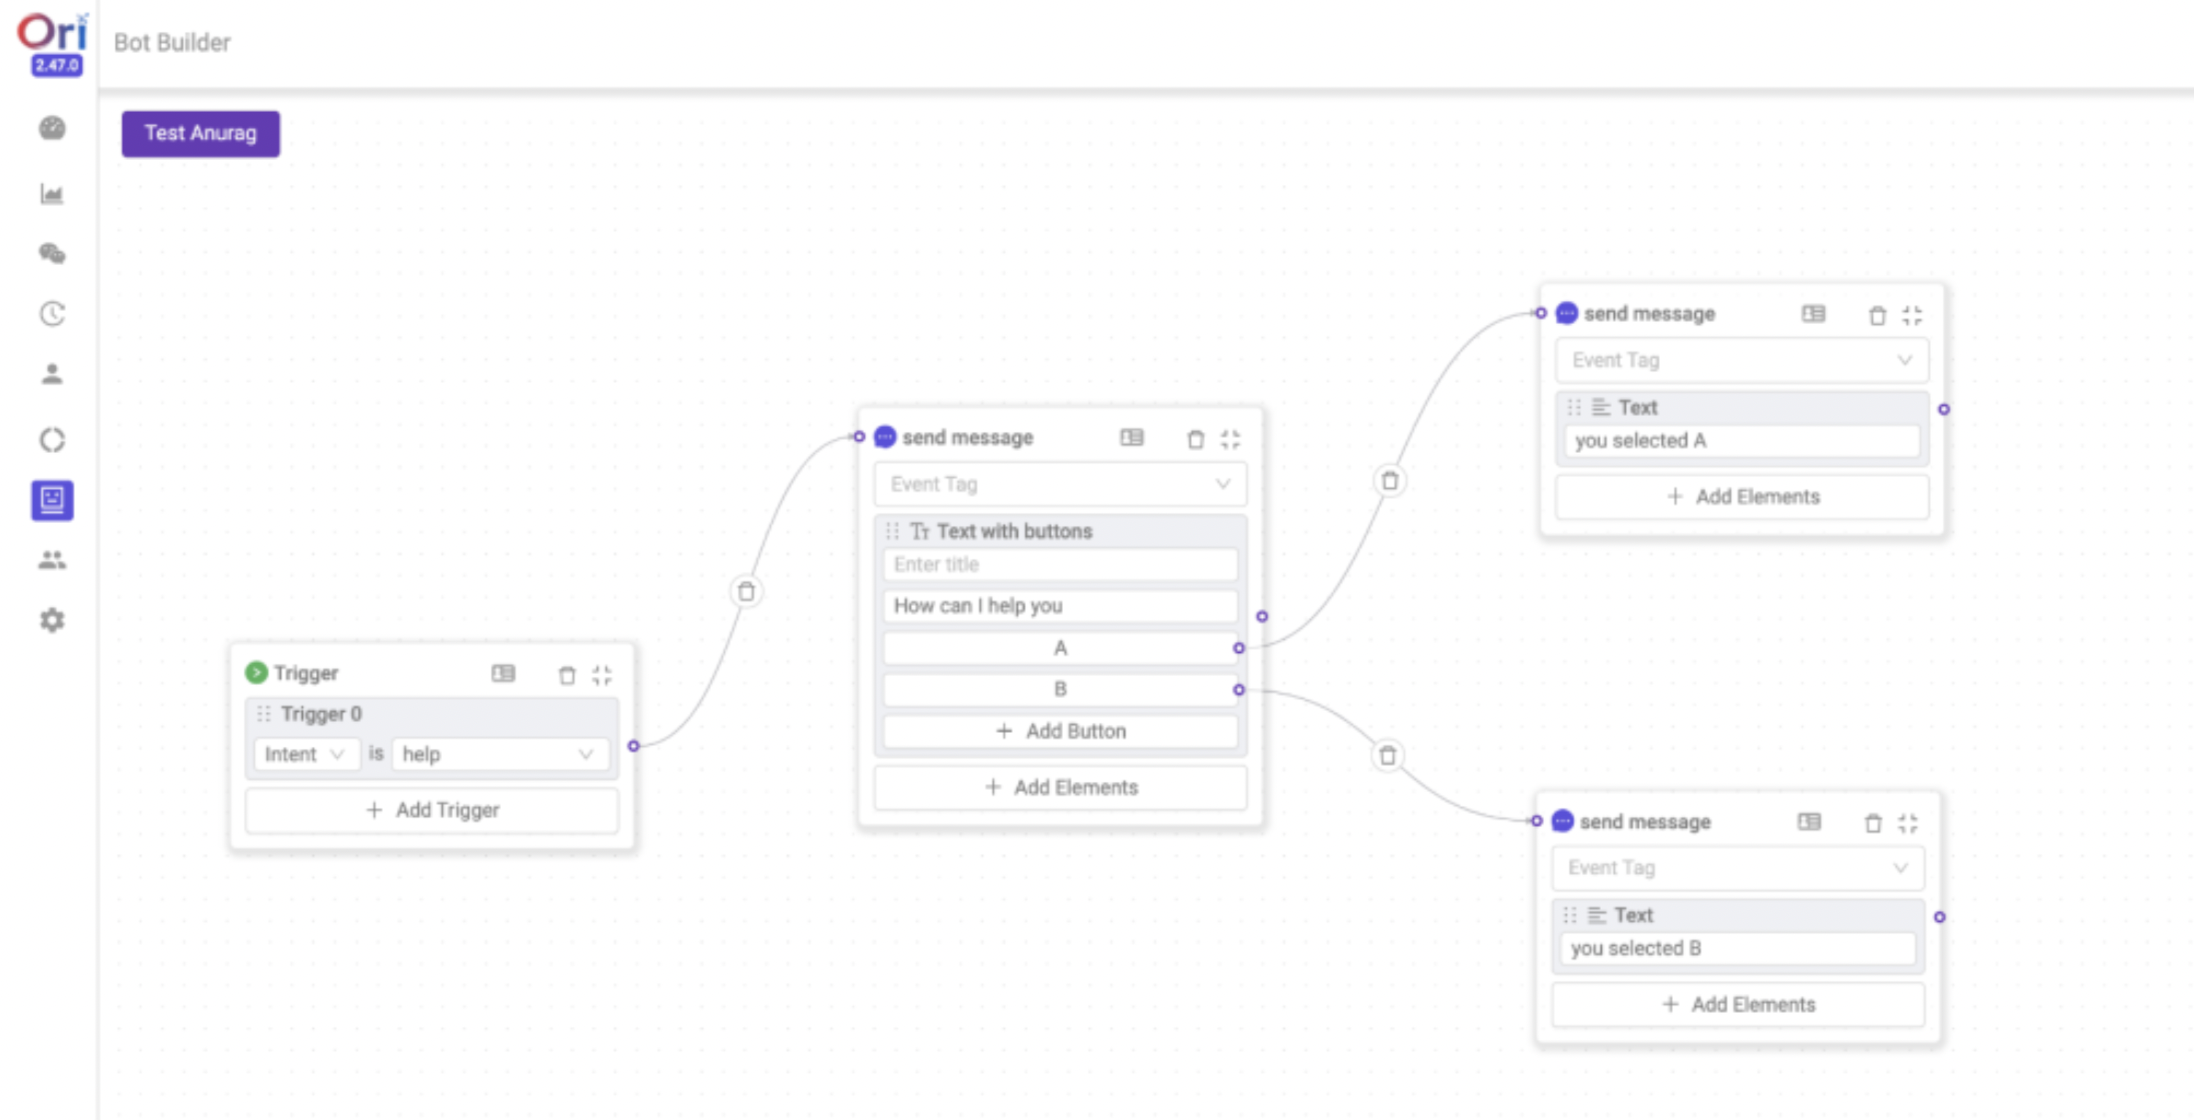
Step 2: Create a connector campaign on MoEngage
To create a connector campaign on MoEngage,
1. Navigate to Create Campaign >> Connectors >> Custom and choose delivery type most suitable to your needs 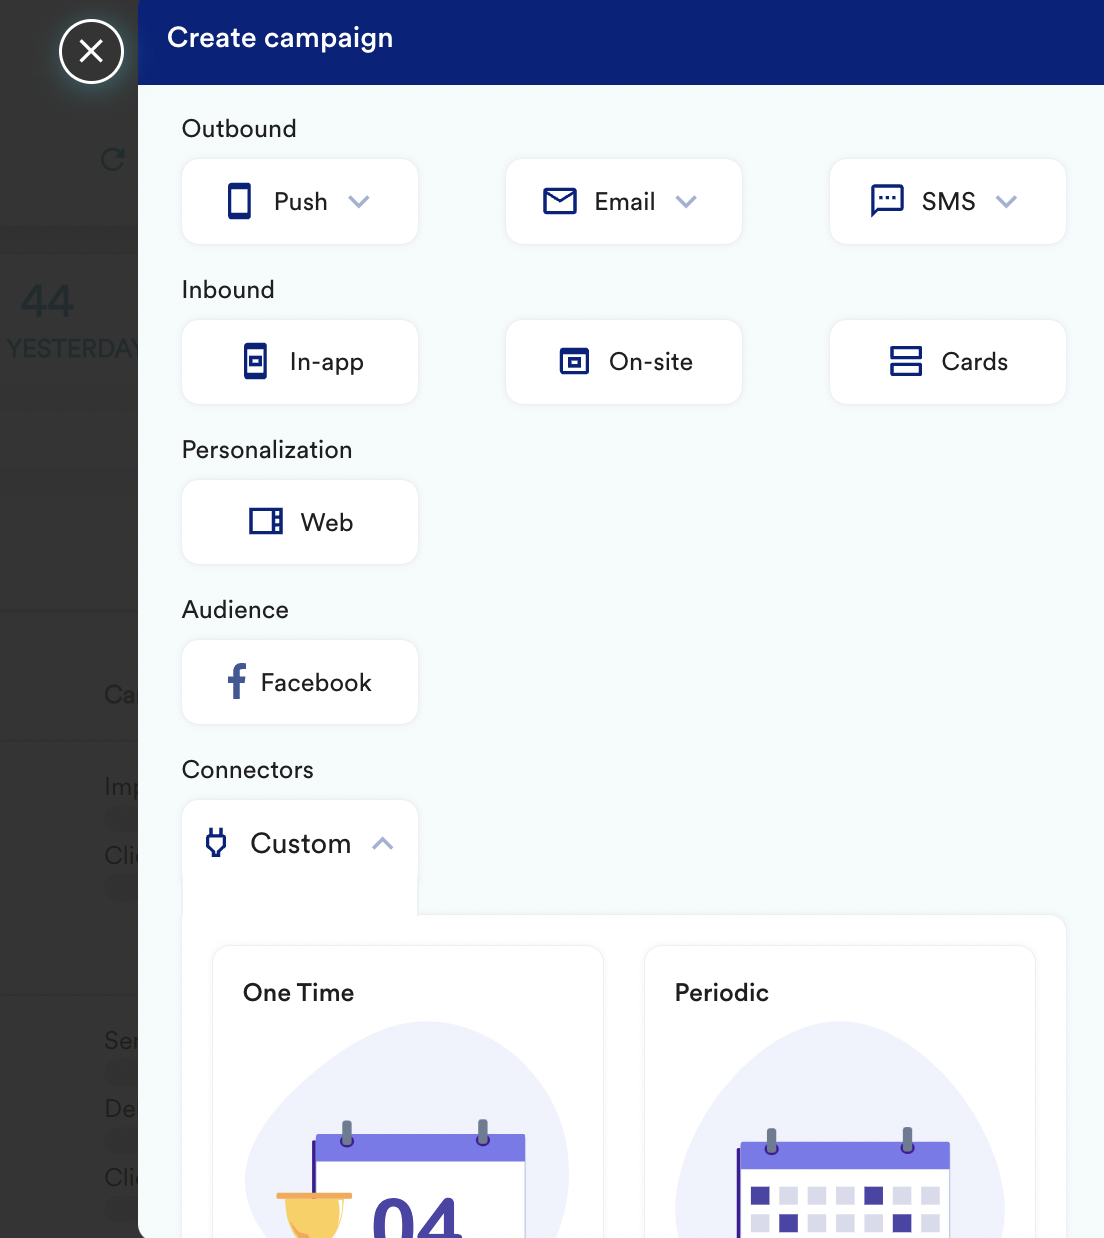
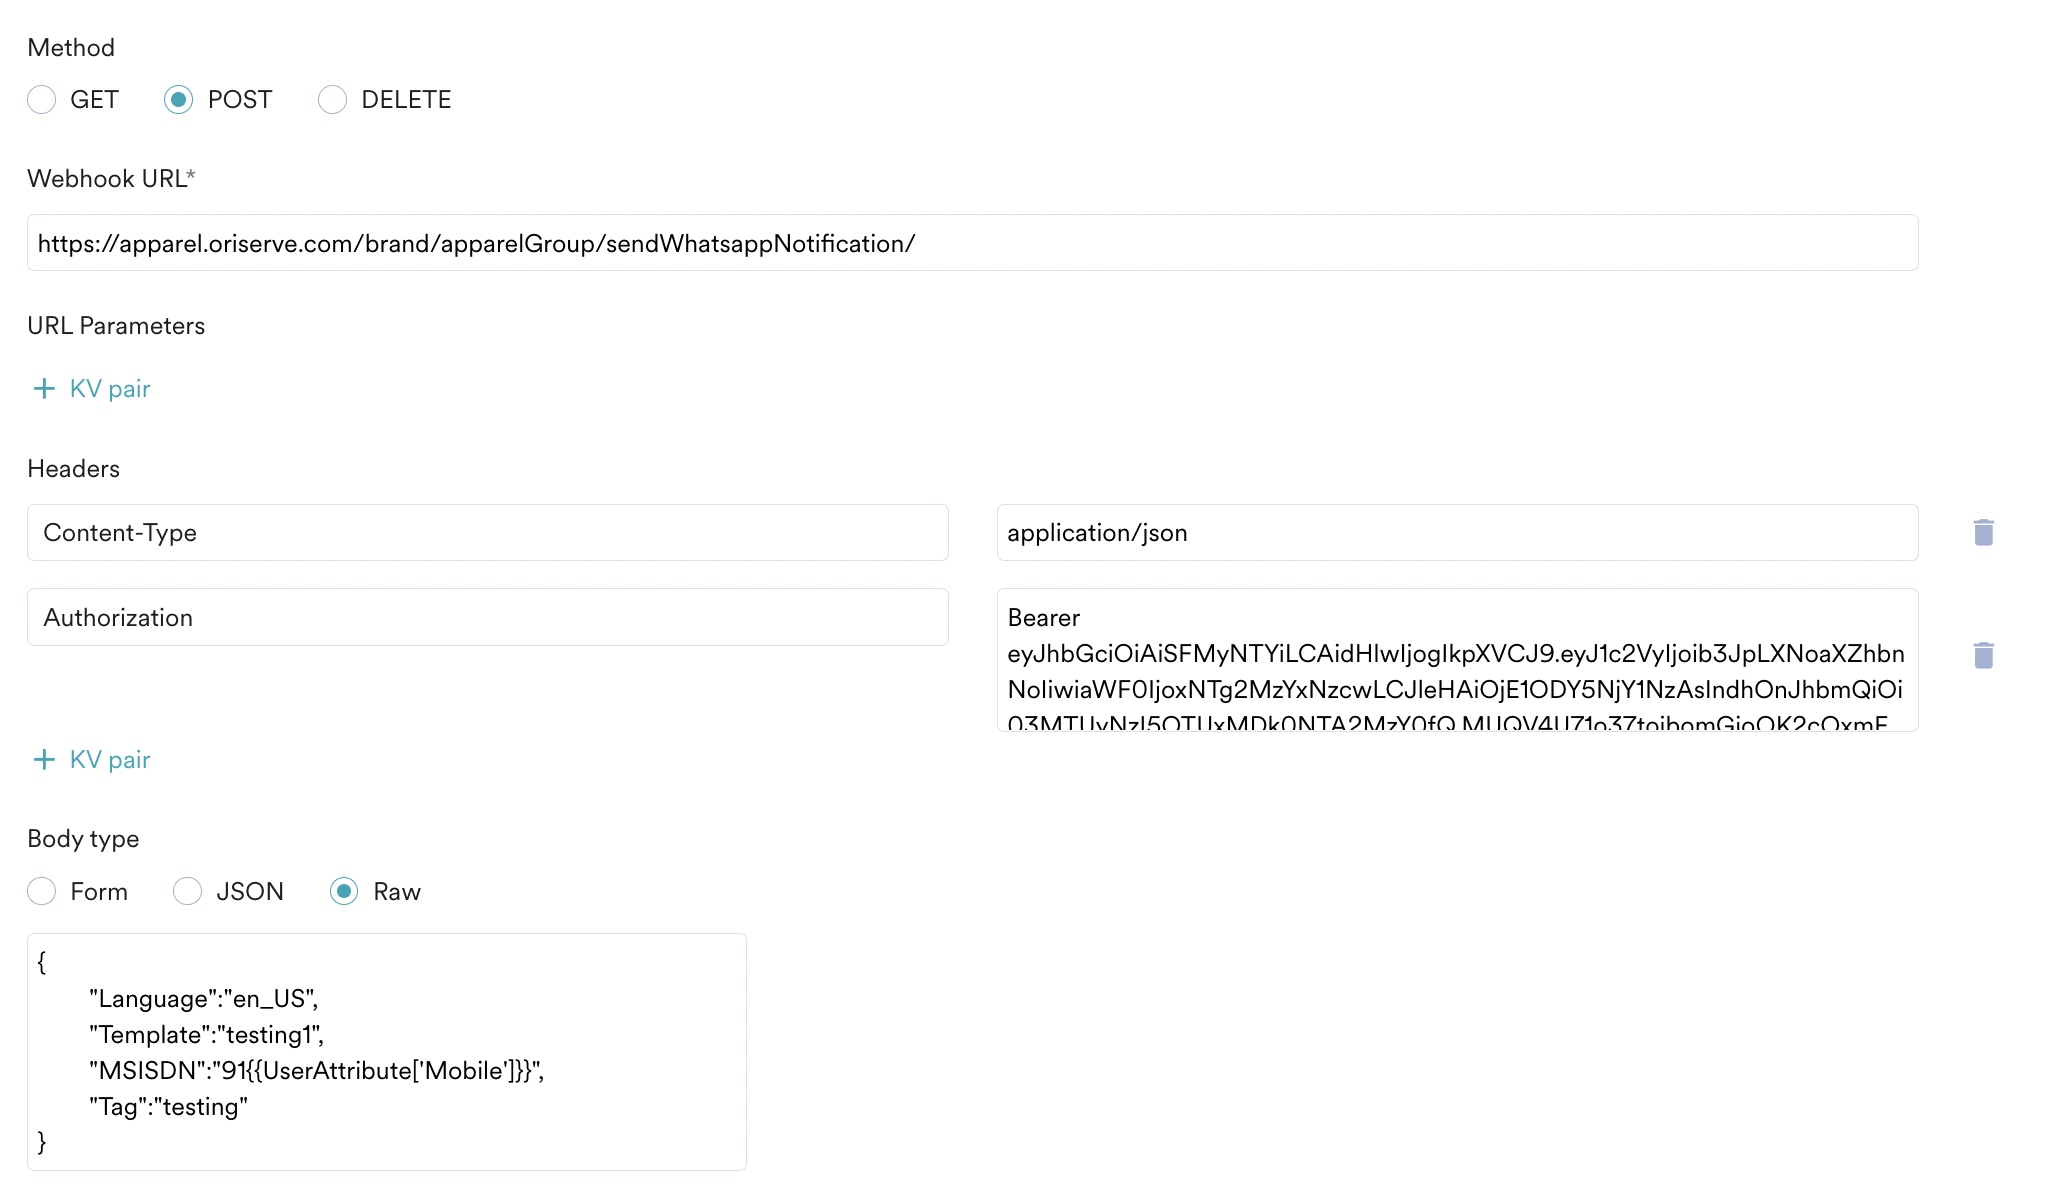
2. On step 2 of the campaign
- Select method as POST
- Add Webhook URL as :
https://apparel.oriserve.com/brand/apparelGroup/sendWhatsappNotification/ - In Headers, add
- Content-Type as application/json
- Authorization as your <Oriserve authorisation key>
- In Body, choose Raw and copy paste the code from your Ori's bot.
3. At this point, your campaign should be ready to test and send. You can also test your connector configuration using the Test functionality available on Step 2 of Create Connector Campaign. 
If your test user successfully receives the message, your set-up is good to go. You can go ahead and Publish the campaign.