Introduction
DataChannel is an end-to-end data integration & activation platform. DataChannel integrates data from disparate sources into a single centralized repository and also supports the reverse flow of data from the repository to the selected apps/ services.
MoEngage <> DataChannel
With the integration of MoEngage and DataChannel, you can forward users directly stored in your data warehouse to MoEngage. This enables you to effectively analyze and segment your users, and target them using campaigns across various channels on MoEngage.
Integration Prerequisites
- Ensure you have access to your DataChannel account.
- Ensure you have at least one Data source/Data warehouse set up. The Data API ID and Data API Key are available at Settings -> Account -> APIs. The Data API ID is the same as the Workspace ID. The Data API Key is available in the same screen in the API Keys -> Data section.
Step 1: Create a data model on DataChannel
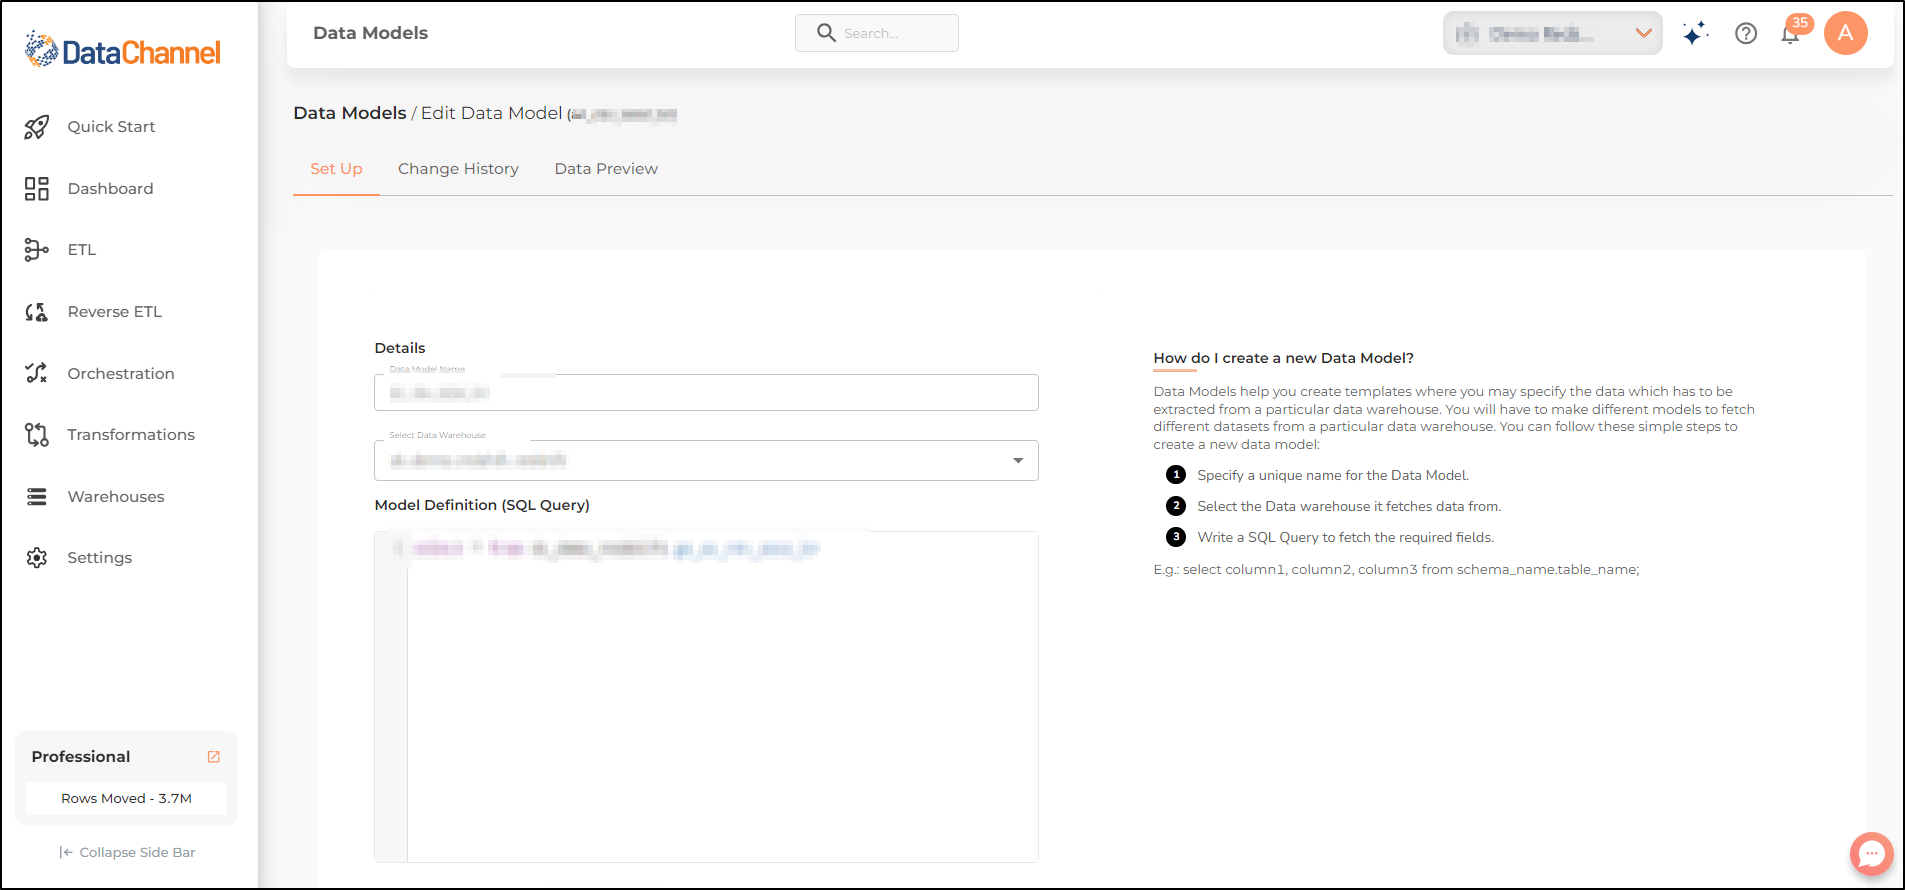
- On your DataChannel dashboard >> go to the Data Models page and click on the Create New button to create a new Data Model for applying to your data in the data warehouse. Make sure that you have added a data warehouse before attempting to create a Data Model.
-
In the fields that appear on the screen, give a name to the Data Model and Select a Data Warehouse to which you want to apply the Data Model. Enter the Model Definition (SQL Query) that you wish to execute to fetch the required fields. Validate the SQL and click the Add Model button.
- If you have not yet added a data warehouse, go to data warehouse tab and add a warehouse.
Step 2: Connect MoEngage to DataChannel
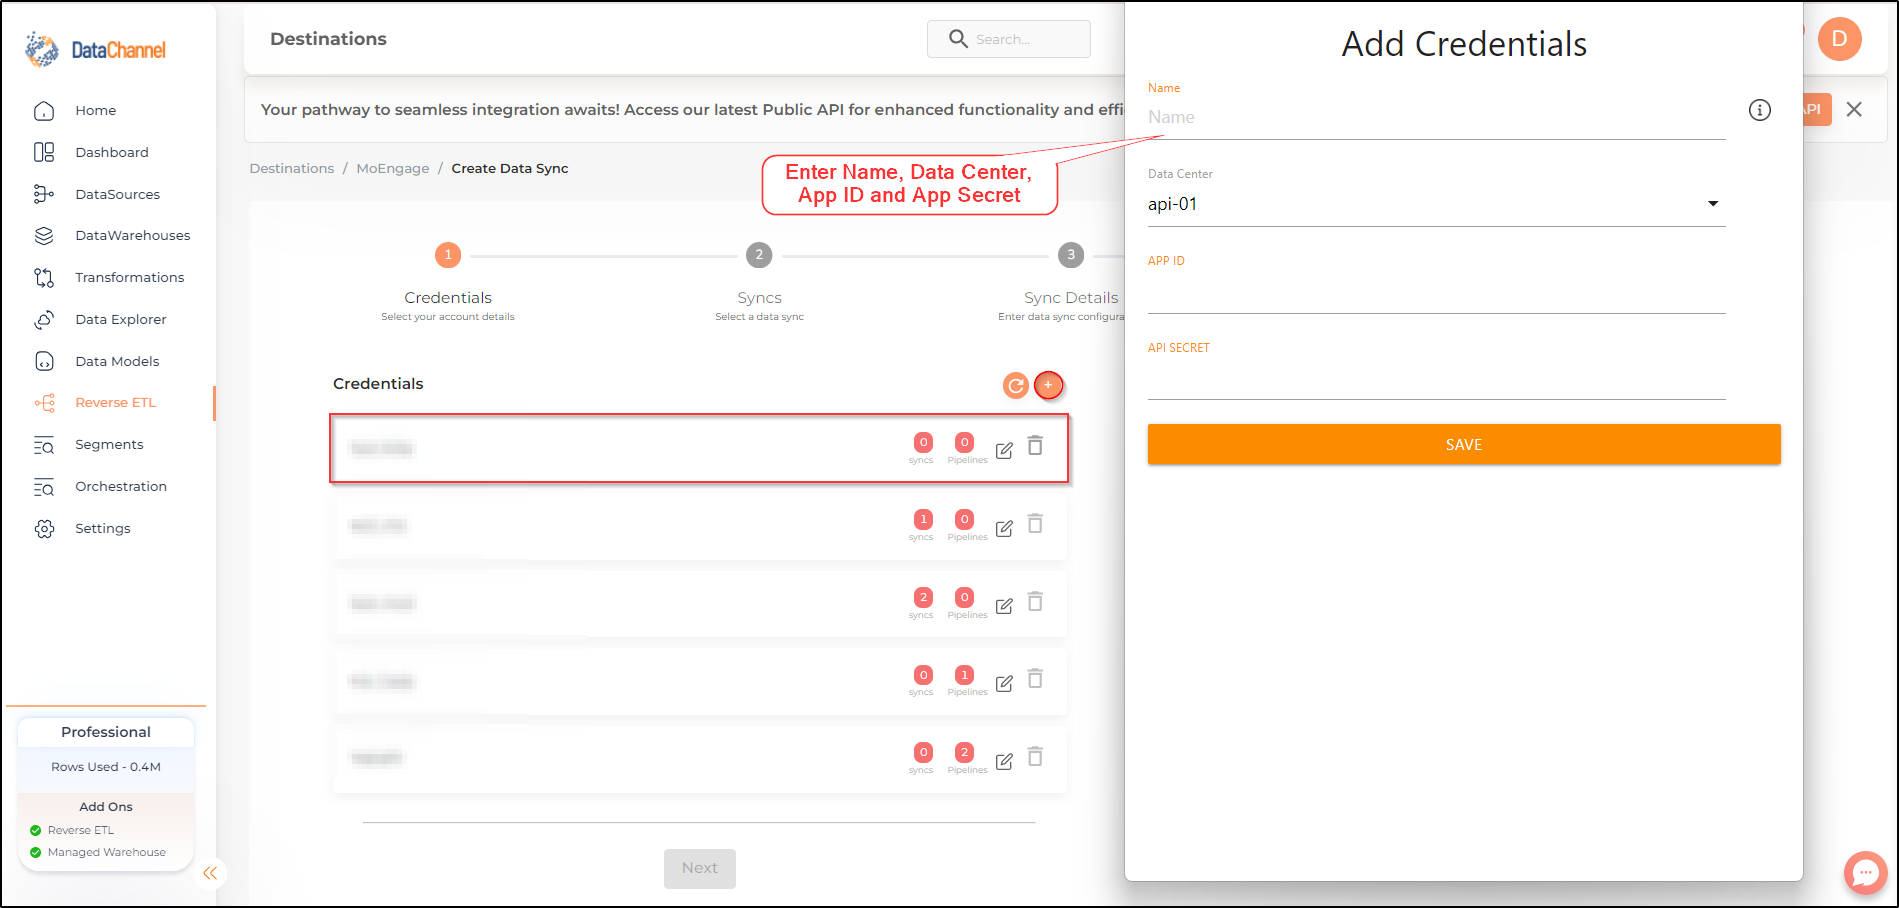
- On your DataChannel Dashboard, go to Destinations >> MoEngage.
- Add a new MoEngage credential:
| FIELD | DETAILS |
|---|---|
| Name | Give this destination a name, "MoEngage". |
| Data Center | Can be found on this page based on your MoEngage URL. Select the value exactly as shown in the REST API Host column. |
| Username |
This is your Data API ID, which is the same the Workspace ID of your MoEngage account. The Workspace ID of your MoEngage account is available at Settings -> Account -> APIs -> Workspace ID. |
| Password |
This is your Data API Key and can be created within the MoEngage Dashboard. The Data API key of your MoEngage account is available at Settings -> Account -> APIs -> API keys > Data API settings. |
Step 3: Set up a new sync with MoEngage
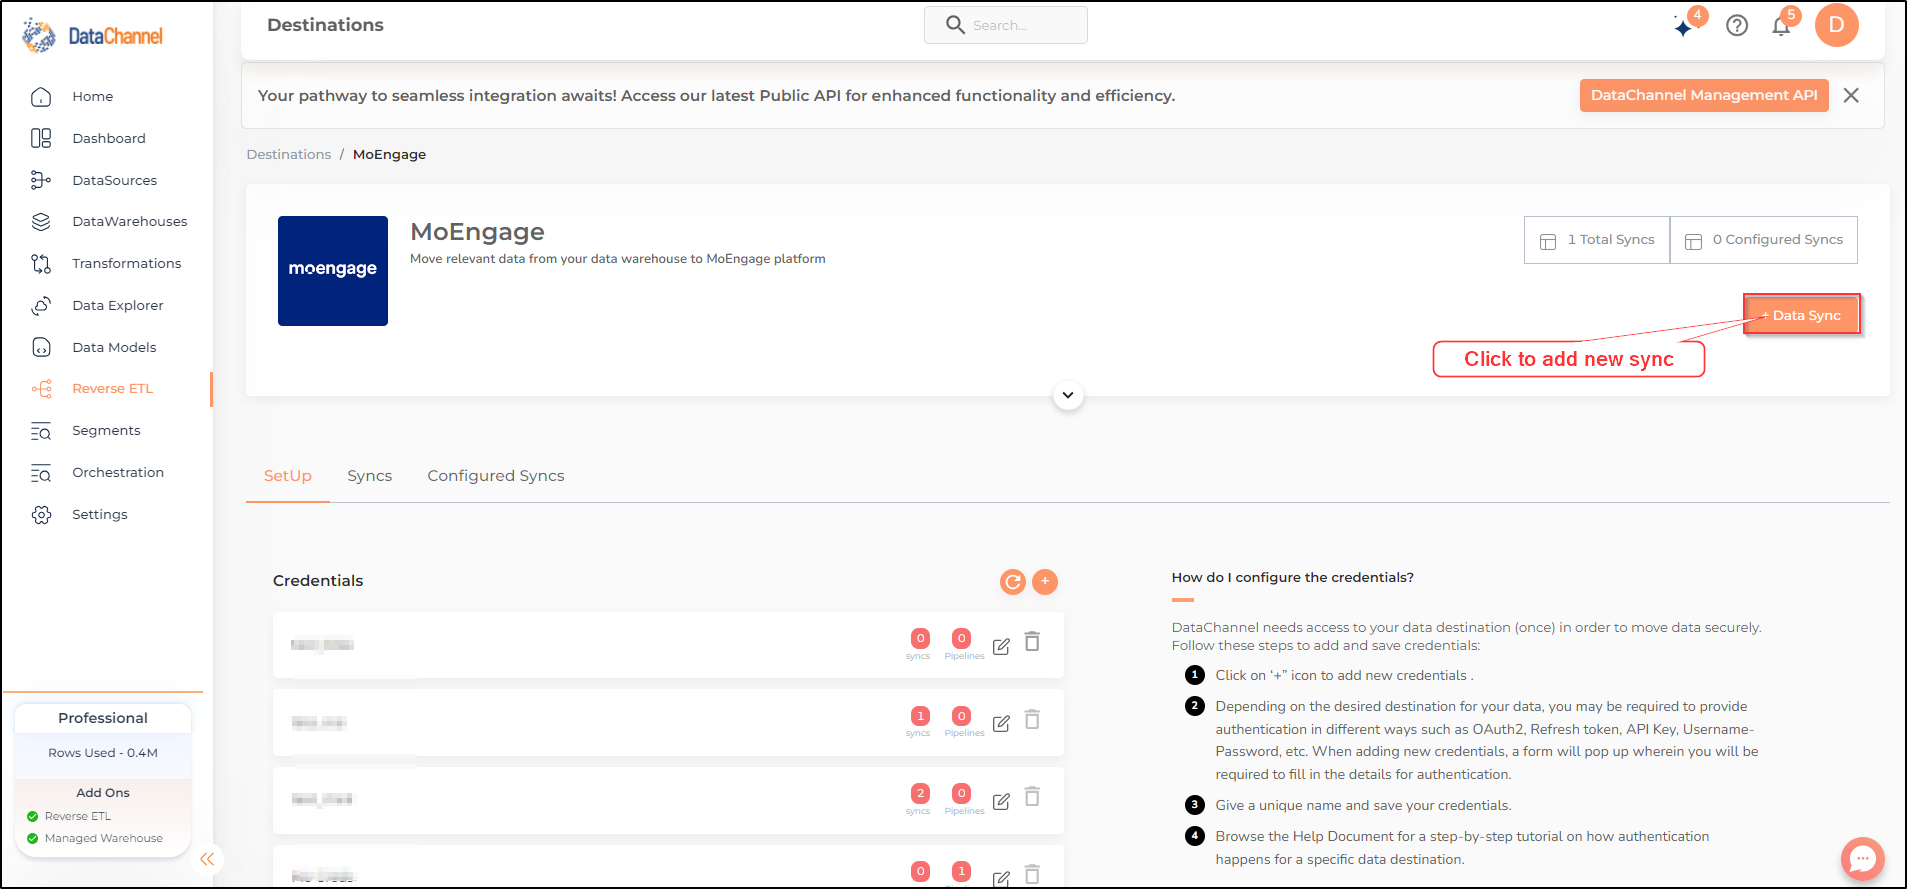
- On the MoEngage destination page, click on + Data Sync to start adding data syncs to your account.
- Select the account credentials which has access to the relevant MoEngage account from the given list and click Next.
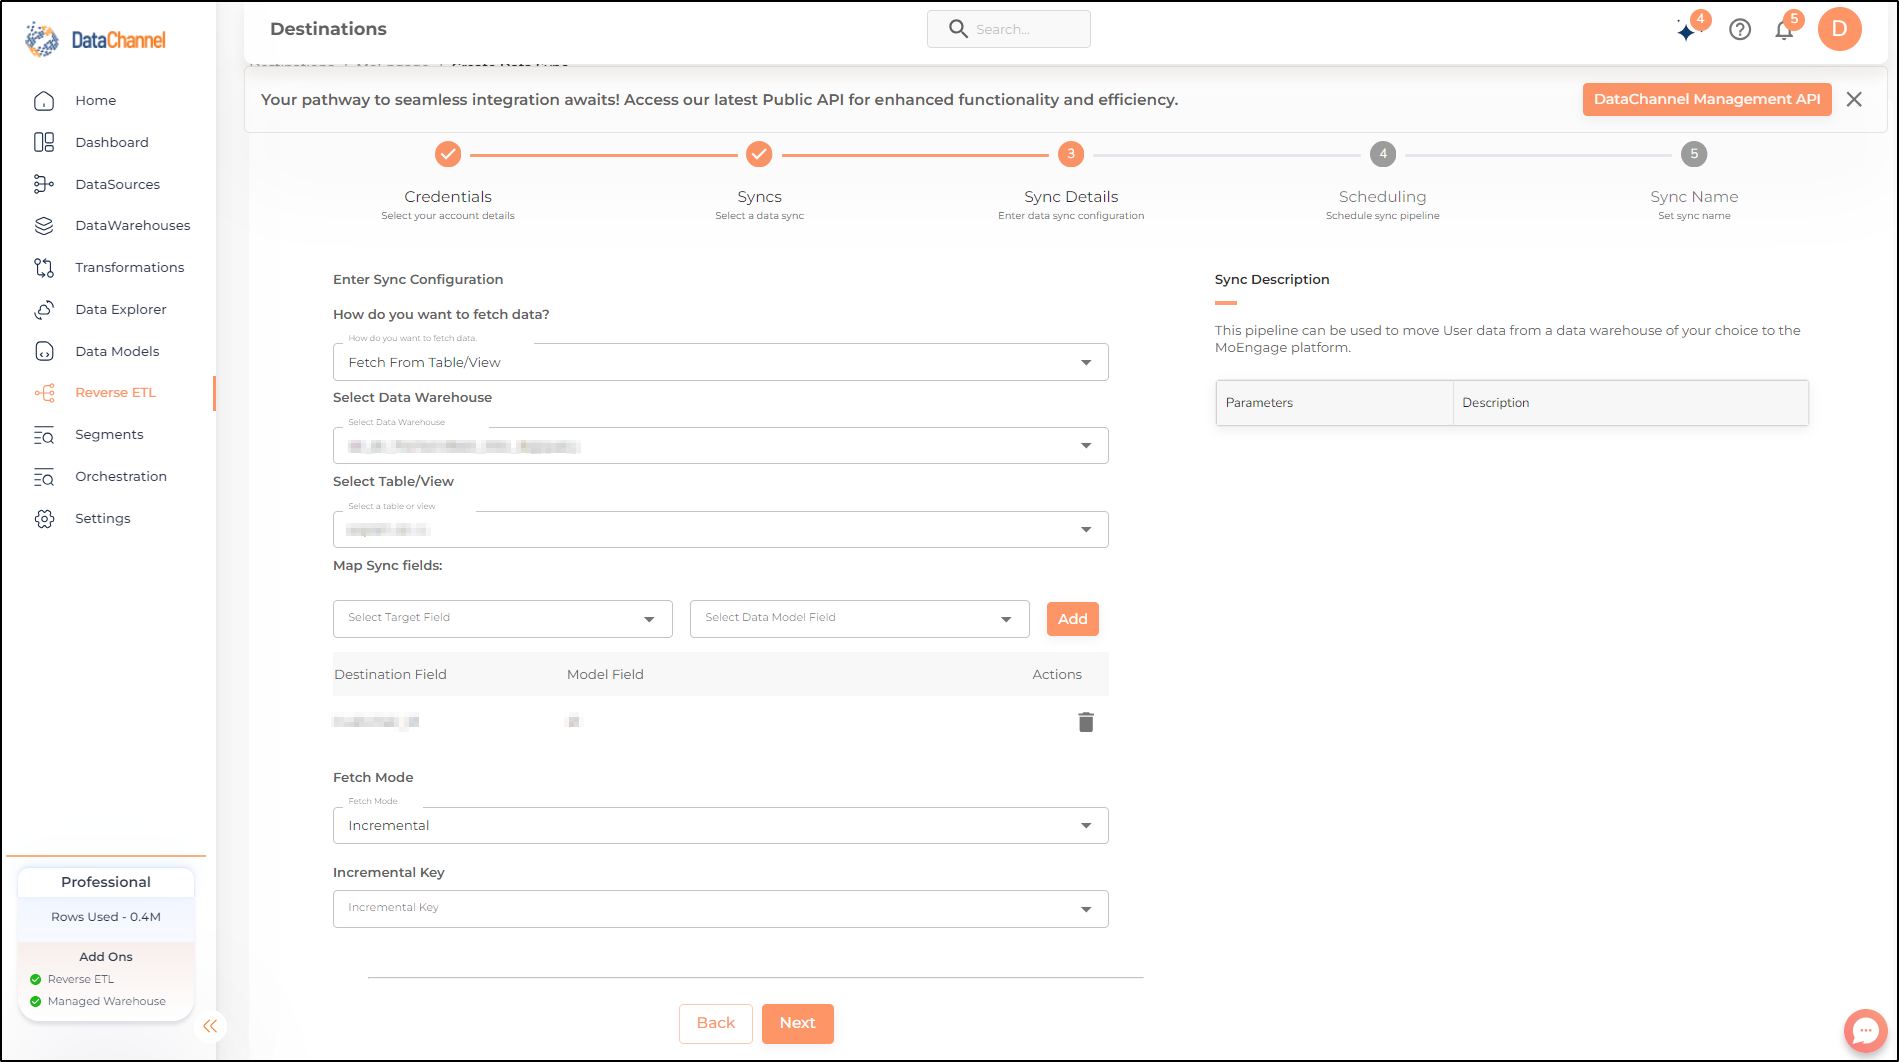
- From the list of data syncs, select User and click Next.
- Select the data model that you would like to use for this sync.
Setting Parameters
| FIELD | DETAILS |
|---|---|
| Fields Selection | Required. Select the field(s) you would like to push in your MoEngage platform here. You can also rename one or more field(s). To push all the fields, simply select SELECT ALL. |
| Fetch Mode | Required. This refers to the manner in which data will get updated: FULL will update the entire column(s) from the selected data, INCREMENTAL will update the fresh record(S) added since the last fetch. |
| Incremental Key Dependant | Required (If Fetch Mode = Incremental). Choose the field that will serve as the Incremental key. |
- Set the schedule for the sync to run. Detailed explanation on scheduling of syncs can be found here.
- Give your sync a name and some description (optional) and click on Finish to save it.
Your users will now be synced to MoEngage.